
Study plan (new)
Study plans are created and edited on the “Study Structure” tab. By default, a study plan is created for the degree program to which the student is admitted. If desired, a study plan can also be created for other degree programs.
The structure of Sisu’s study plan tool guides students in planning the courses they are required to take. As long as the student plans their studies in accordance with the structure of the degree program, the plan is in an approvable state. Therefore, there is no need for separate approval of the study plan unless a section of the study plan deviates from the structure of the degree program. It is important that students continue to update their study plans even after receiving approval, and that the study plan be used to support their academic planning throughout the duration of their studies. In the future, the study plan will also be used, for example, to compile study modules and apply for a degree; therefore, it is important to keep the study plan constantly up to date in case changes to your plans arise as your studies progress. Sisu automatically saves the study plan after every change, so separate historical versions of the study plan are not saved unless you choose to create an entirely new study plan as a new version.
An education coordinator can view the study plans of students in their own advisory group and, if desired, can agree to approve a study plan separately—for example, during study plan meetings or by marking the plans as approved using Sisu’s internal study plan comment tool. Whether the department’s StudentLife student well-being advisors (Hyvikset) have the right to view students’ study plans is determined on a unit-by-unit basis; if necessary, this right can be granted on an individual basis.
Creating a Study Plan
To begin planning your studies, log in to the Sisu system using your JYU credentials. The first time you log in, Sisu will ask you to create a study plan, or it will inform you that you do not have any study plans and prompt you to go to the Study Structure tab. The first time you create a new study plan, you’ll do so directly in the Create a New Study Plan window that opens when you click the “Study Structure” page. If you already have an old study plan and want to create a new one, click the three dots in the upper-right corner of the “Study Structure” page and select New Study Plan.
The My Education tab provides a study plan template based on your right to study. Students admitted to the same program generally follow the same study path, so there is no need to separately select or change the study option offered by Sisu. The exception to this are students admitted to the Bachelor’s and Master’s programs in Multidisciplinary Language Studies, who must select a study option for their plan that corresponds to their specific degree program (i.e., the regular joint application process or the VY transfer application).
The system automatically suggests a study plan for you based on the current curriculum period. The curriculum period is selected according to the year you began your studies. Therefore, if you are creating a study plan retroactively, select the curriculum period corresponding to your start year so that you can correctly view any courses you may have already completed. The academic year begins on August 1 and ends on July 31.
Sisu automatically names the study plan based on its creation date. You can change the name of the study plan if you wish. The name of the study plan is visible to the staff guiding your studies.
Finally, select Create Plan.

If you want to update your study plan to a newer version later, you can change the curriculum period for your program by creating a new plan. For example, if a new plan were created on February 15, 2022, the student could choose from four different curriculum periods: August 1, 2020–July 31, 2021, August 1, 2021–July 31, 2022, August 1, 2022–July 31, 2023, or August 1, 2023–July 31, 2024 (the most recent period is displayed if one has already been created and published). This updates the structure and content of the study plan to match the version of the curriculum for the selected period.
Primary Study Plan
The first study plan you create is automatically set as the primary one. If you create multiple plans for the same education, you can specify which one is the primary plan and change your selection as needed. To do this, click the three dots on the right side of the plan view and select “Set as Primary.” You cannot delete a primary study plan. From the same location, you can also rename the plan, print it, or delete it.

By default, the Structure page displays the study plan that was last edited. If you have multiple study plans, you can switch between them by clicking the name of a study plan and selecting the one you want to view from the drop-down menu. The study plan you are viewing remains active when you navigate to the study schedule screen or the study calendar.
All courses to be completed must be included in the primary study plan corresponding to your study right to ensure that your course completion records are compiled correctly and on time. If you have multiple study plans, make sure the correct one is marked as the primary study plan!

Viewing Course Information in the Study Plan
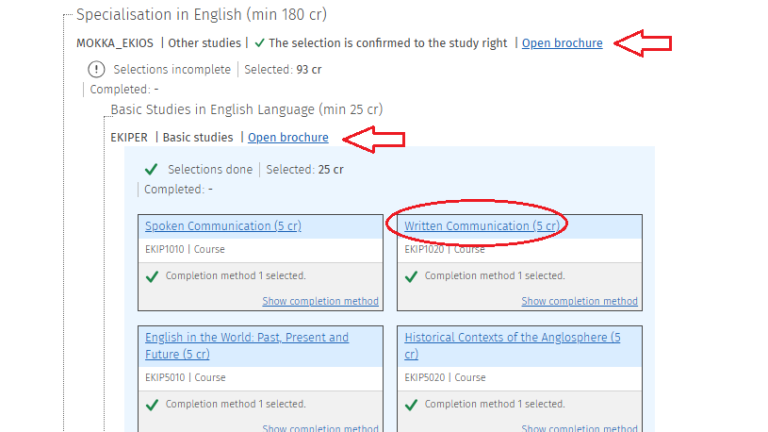
You can view information about courses, study modules, and degree programs—such as their content, learning outcomes, and prerequisites—through the course overviews. To open a course brochure, click the blue link in the name of each course. To open the brochures for study modules and degree programs, click the “Open Brochure” link.
Equivalent Courses
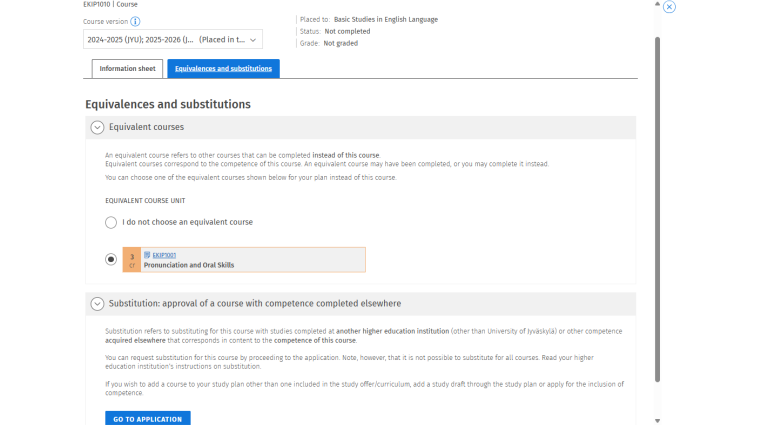
The Equivalences and Substitutions tab in the course brochure (accessible via the blue course code) includes a section titled Equivalences that indicates whether a course can be substituted with another course. If you want to take or have already taken an equivalent course and wish to use it to substitute for a course in your study plan, select the substitute course in the course description.
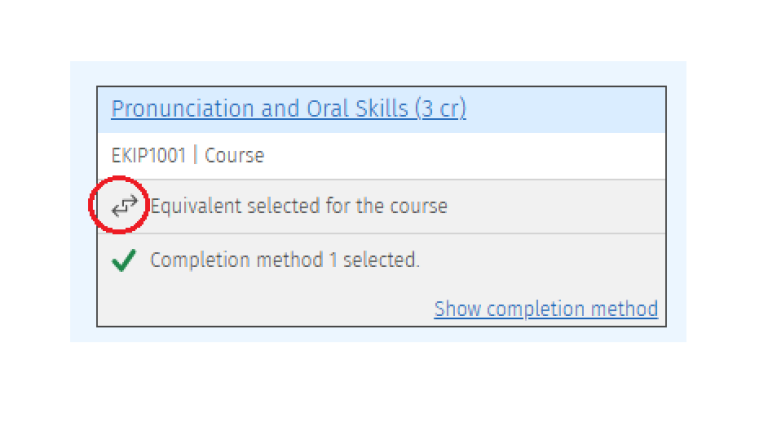
The course you have now selected appears in the structure in place of the replaced course. The course box icon includes an arrow symbol, indicating that this is an equivalent course.
Structure of the Study Plan
Sisu guides you in planning your studies by showing which degree programs, as well as the study modules and courses they include, are part of your program. You can make selections for your plan using the selection assistant, which you can open by clicking the three dots in the structure of your plan next to the study element for which you want to make selections. You can request guidance from your education coordinator at any time by clicking the “Guidance” button in the upper right corner of your study plan. For example, you can ask for advice on selections for a specific module by leaving a comment targeting that module, or leave a general comment regarding your entire study plan.
Required Courses
The required study modules and courses for your degree program are automatically displayed in your plan. You do not need to search for or select these courses separately for your study plan. You also cannot deselect required courses except in Free Edit mode (see Planning a Structure That Deviates from the Degree Program).
Optional Courses
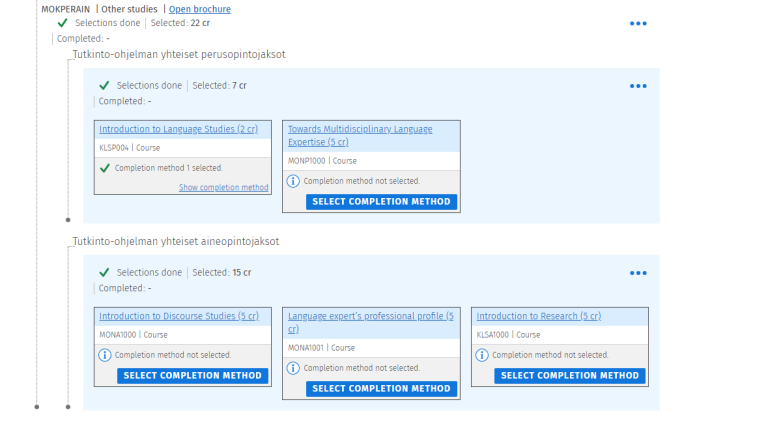
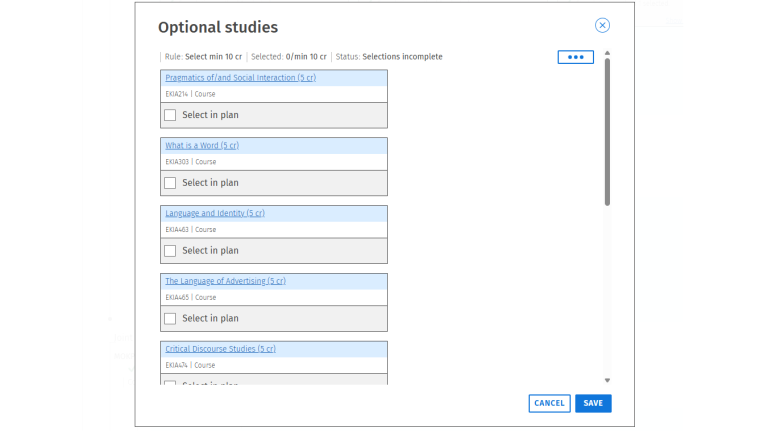
You can add optional courses to your plan using the selection assistant. Open the selection assistant by clicking the three dots next to the module or heading for which you want to add courses to your plan. The selection assistant shows which courses you can include in this section of your plan and how many modules or courses—or, equivalently, how many credits—you must select. Once you have selected a sufficient number of courses, the message Selections made will appear in the selection assistant and next to the relevant module or heading in your plan.
Elective Courses
If your degree program includes elective courses, you can search for them under the “Elective Courses” heading. Open the selection assistant by clicking the three dots next to the heading and search for courses or study modules by name or code. The selection assistant also provides additional information regarding the completion of elective courses. If you select a study module for your plan, check the University of Jyväskylä Study Guide or the departments’ websites to see whether the courses are freely available or if you need to apply for special admission to take them. Selecting courses for your plan does not in all cases guarantee the right to study.
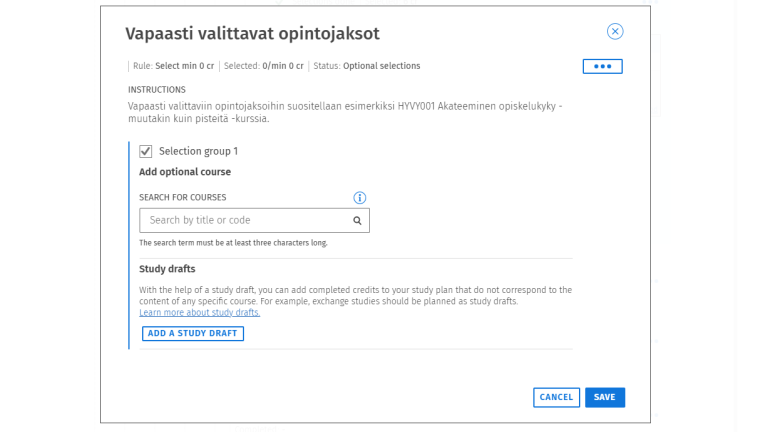
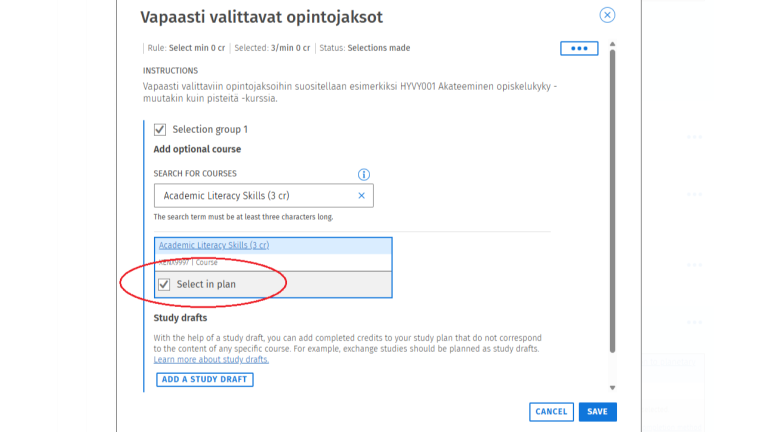
If the study module you have selected includes elective courses, you can select the courses in the same way as for modules that are part of a degree program. You can remove freely selectable courses from your plan by deselecting the Freely Selectable Courses option under the Select for Plan heading in the selection assistant and then saving your changes.
Study draft
Students can create a study draft within their study plan, specifying the title and credits of the course. The study draft can be used, for example, to apply for recognition of studies completed elsewhere or custom course credits (e.g., study abroad) to be included in a degree.
To add a study draft, select the section or subheading in the study plan where you want to add it, then click the three dots on the right-hand side. Please note that a study draft is treated like a regular course, meaning it counts toward the credits of the module or subheading, and/or the selected courses. A subheading or study module may therefore violate the rules if a study draft is added that does not fit within the structure of that section. A study draft can be added to free-choice studies (elective courses) without violating the rules.
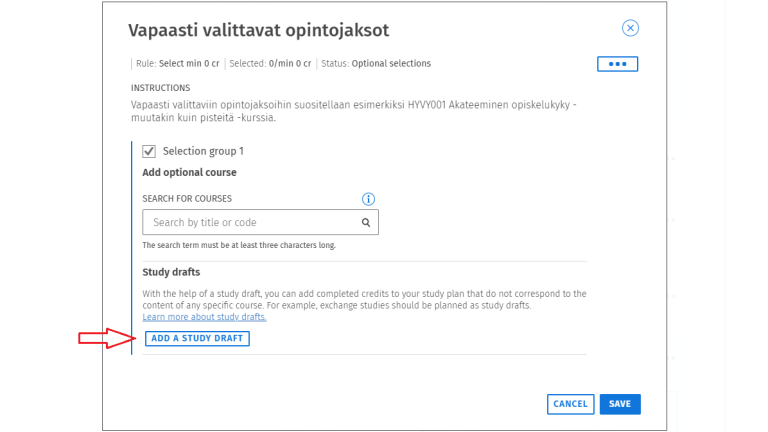
When you click the three dots, the structure of the study module opens in the selection assistant in the center of the screen. Go to the free editing mode by clicking the three dots and then click the “Add a Study Draft” button at the bottom of the selection assistant. Clicking the “Add a Study Draft” button opens an addition modal where you can enter the necessary information for the study draft. The name of the study draft is the information that appears to both the student and their education coordinator(s) in the study plan structure.
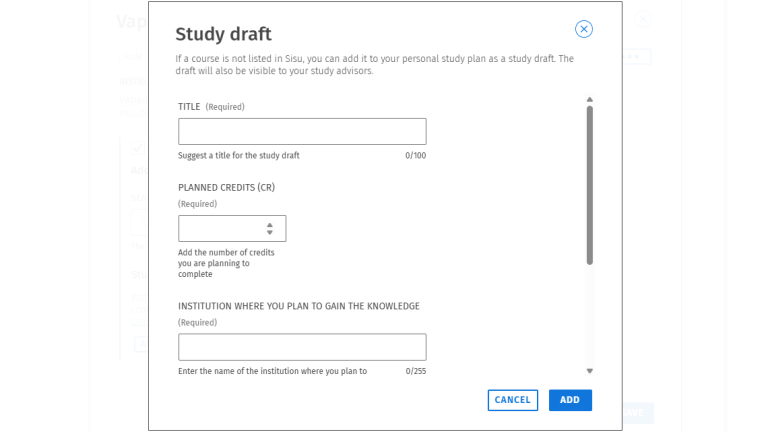
Planned credits is the number of credits that a student proposes or estimates as the scope of a completed course or set of courses included in the degree. The credits are shown in the study draft and are included in the calculation of the total credits of the degree in the study plan. In the “Place of Study” field, the student indicates where they intend to complete the course personally, or where the course to be included was completed (e.g., another institution of higher education, open universities, exchange institution, etc.).
In the “Description” field, the student provides a free-form description of what they plan to do to complete the study draft, how, and where. This may include, for example, a course earned in previous studies, an internship not part of the degree structure, or a course completed at an exchange institution. All fields must be filled out before the “Add” button becomes active. You can cancel the addition of a study draft by clicking the “Cancel” button.
Once all information has been entered, the study draft can be added to the structure. Clicking the study draft’s identifier displays the information entered for the draft.
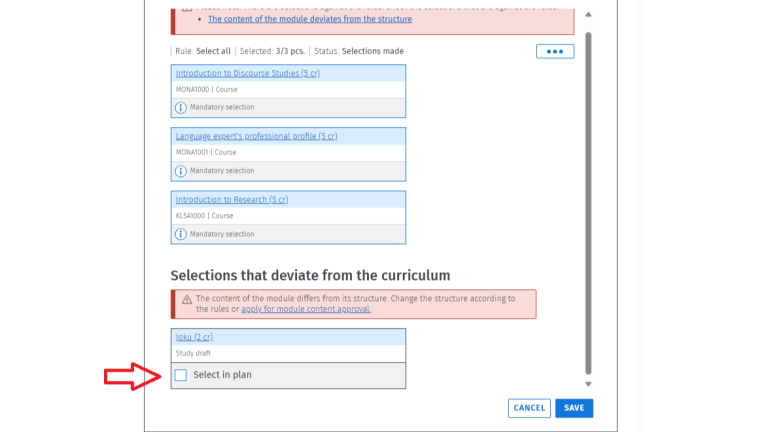
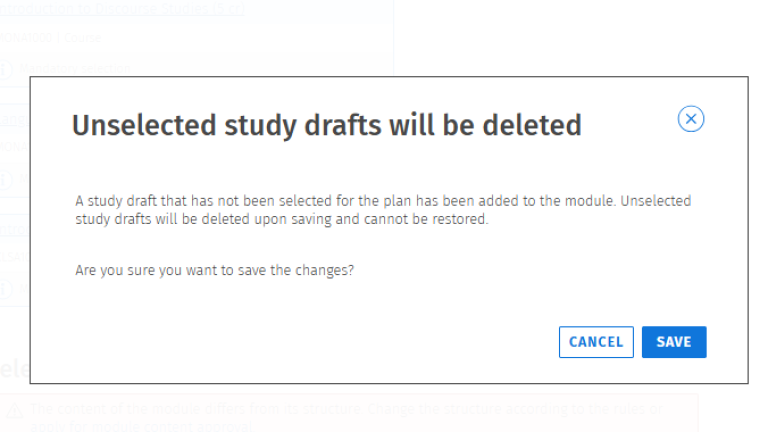
The study draft appears in the structure under the selected module or subheading level, as well as in the selection assistant for that module or subheading. In the selection assistant, you can remove the study draft from the structure by leaving it unselected in the plan. NOTE! Deletion is permanent, and a deleted draft cannot be restored.
Removing a Course from the Study Plan
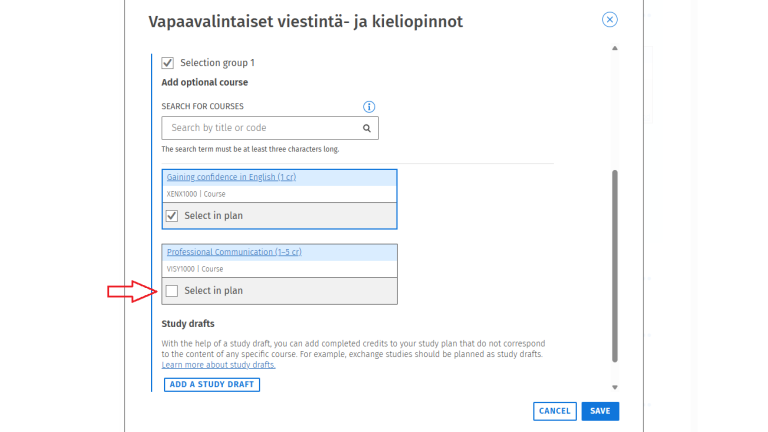
To remove a course, click the three dots next to the section in your study plan that contains the course you want to remove. The courses will appear as a list in the selection assistant that opens. Optional courses can be removed directly from the selection assistant. Otherwise, you can remove a course by clicking the three dots at the top of the selection assistant to enter free edit mode. To remove a course, simply deselect it and save your changes.
Deleting a Study Plan
You can delete a study plan by clicking the three dots in the upper-right corner and selecting “Delete Study Plan.” If this is the only study plan you have created for a program in which you have the right to study, you cannot delete it. In this case, create a new study plan for the same program and set it as the primary plan. After that, you’ll be able to delete the original plan. Please note that deleting a study plan also deletes any comments associated with the plan and all communication with your education coordinator(s)!